Oh no, not another 'Is Rust better than Go?' article. Seriously, haven't we all had our fill of these comparisons by now? But before you sigh in exasperation, hear us out!
Many comparisons between Go and Rust emphasize their differences in syntax and the initial learning curve. However, ultimately, what matters is the ease of use for non-trivial projects.
Since we are a platform-as-a-service provider, we think that we can contribute the most by showing you how to build a small web service in both languages. We will use the same task and popular libraries for both languages to compare the solutions side-by-side so that you can make up your own mind and get a feel for what it's like to work in each ecosystem.
So, before you dismiss this as 'just another comparison', give it a read. There might be some details that other comparisons have missed before.
That old "Rust versus Go" debate
Rust vs Go is a topic that keeps popping up and there has been a lot written about it already. That is in part because developers are looking for information to help them decide which language to use for their next web project, and both languages get frequently mentioned in that context. We looked around, but there really is not much in-depth content on the topic out there, so developers are left to figure it out on their own and run the risk of dismissing an option too early due to misguided reasons.
Both communities often face misconceptions and biases. Some view Rust primarily as a systems programming language, questioning its suitability for web development. Meanwhile, others label Go as overly simplistic, doubting its capacity to handle intricate web applications. However, these are merely superficial judgments.
In reality, both languages are fine to be used for writing fast and reliable web services. However, their approaches are quite different, and it is hard to find a good comparison that tries to be fair to both.
This post is our attempt to give you an overview of the differences between Go and Rust with a focus on web development by building a non-trivial real-world application in both languages. We will go beyond the syntax and take a closer look at how the langauges handle typical web tasks like routing, middleware, templating, db access and more.
By the end of this post, you should have a good idea of which language is the right one for you.
Although we are aware of our own biases and preferences, we we will try to be as objective as possible and highlight the strengths and weaknesses of both languages.
Building a small web service
We will cover the following topics:
- Routing
- Templating
- Database access
- Deployment
We will leave out topics like client-side rendering or migrations, and focus on the server-side only.
The task
Picking a task that is representative for web development is not easy: On one hand, we want to keep it simple enough so that we can focus on the language features and libraries. On the other hand, we want to make sure that the task is not too simple so that we can show how to use the language features and libraries in a realistic setting.
We decided to build a weather forecast service. The user should be able to enter a city name and get the current weather forecast for that city. The service should also show a list of recently searched cities.
As we extend the service, we will add the following features:
- A simple UI to display the weather forecast
- A database to store recently searched cities
The Weather API
For the weather forecast, we will use the Open-Meteo API, because it is open source, easy to use, and offers a generous free tier for non-commercial use of up to 10,000 requests per day.
We will use these two API endpoints:
- The GeoCoding API to get the coordinates of a city.
- The Weather Forecast API to get the weather forecast for the given coordinates.
There are libraries for both Go (omgo) and Rust (openmeteo), which we would use in a production service. However, for the sake of comparison, we want to see what it takes to make a "raw" HTTP request in both languages and convert the response to an idiomatic data structure.
A Go web service
Choosing a web framework
Being originally created to simplify building web services, Go has a number of great web-related packages. If the standard library doesn't cover your needs, there are a number of popular third-party web frameworks like Gin, Echo, or Chi to choose from.
Which one to pick is a matter of personal preference. Some experienced Go developers prefer to use the standard library and add a routing library like Chi on top of it. Others prefer a more batteries-included approach and use a full-featured framework like Gin or Echo.
Both options are fine, but for the purpose of this comparison, we will choose Gin because it is one of the most popular frameworks and it supports all the features we need for our weather service.
Making HTTP requests
Let's start with a simple function that makes an HTTP request to the Open Meteo API and returns the response body as a string:
func getLatLong(city string) (*LatLong, error) {
    endpoint := fmt.Sprintf("https://geocoding-api.open-meteo.com/v1/search?name=%s&count=1&language=en&format=json", url.QueryEscape(city))
    resp, err := http.Get(endpoint)
    if err != nil {
   	 return nil, fmt.Errorf("error making request to Geo API: %w", err)
    }
    defer resp.Body.Close()

    var response GeoResponse
    if err := json.NewDecoder(resp.Body).Decode(&response); err != nil {
   	 return nil, fmt.Errorf("error decoding response: %w", err)
    }

    if len(response.Results) < 1 {
   	 return nil, errors.New("no results found")
    }

    return &response.Results[0], nil
}
The function takes a city name as an argument and returns the coordinates
of the city as a LatLong struct.
Note how we handle errors after each step: We check if the HTTP request was successful, if the response body could be decoded, and if the response contains any results. If any of these steps fails, we return an error and abort the function. So far, we just needed to use the standard library, which is great.
The defer statement ensures that the response body is closed after the
function returns. This is a common pattern in Go to avoid resource leaks.
The compiler does not warn us in case we forget, so we need to be careful
here.
Error handling takes up a big part of the code. It is straightforward, but it can be tedious to write, and it can make the code harder to read. On the plus side, the error handling is easy to follow, and it is clear what happens in case of an error.
Since the API returns a JSON object with a list of results, we need to define a struct that matches that response:
type GeoResponse struct {
    // A list of results; we only need the first one
    Results []LatLong `json:"results"`
}

type LatLong struct {
    Latitude  float64 `json:"latitude"`
    Longitude float64 `json:"longitude"`
}
The json tags tell the JSON decoder how to map the JSON fields to the struct fields. Extra fields in the JSON response are ignored by default.
Let's define another function that takes our LatLong struct and returns the weather forecast for that location:
func getWeather(latLong LatLong) (string, error) {
    endpoint := fmt.Sprintf("https://api.open-meteo.com/v1/forecast?latitude=%.6f&longitude=%.6f&hourly=temperature_2m", latLong.Latitude, latLong.Longitude)
    resp, err := http.Get(endpoint)
    if err != nil {
   	 return "", fmt.Errorf("error making request to Weather API: %w", err)
    }
    defer resp.Body.Close()

    body, err := io.ReadAll(resp.Body)
    if err != nil {
   	 return "", fmt.Errorf("error reading response body: %w", err)
    }

    return string(body), nil
}
For a start, let's call these two functions in order and print the result:
func main() {
    latlong, err := getLatLong("London") // you know it will rain
    if err != nil {
   	 log.Fatalf("Failed to get latitude and longitude: %s", err)
    }
    fmt.Printf("Latitude: %f, Longitude: %f\n", latlong.Latitude, latlong.Longitude)

    weather, err := getWeather(*latlong)
    if err != nil {
   	 log.Fatalf("Failed to get weather: %s", err)
    }
    fmt.Printf("Weather: %s\n", weather)
}
This will print the following output:
Latitude: 51.508530, Longitude: -0.125740
Weather: {"latitude":51.5,"longitude":-0.120000124, ... }
Nice! We got the weather forecast for London. Let's make this available as a web service.
Routing
Routing is one of the most basic tasks of a web framework. First, let's add gin to our project.
go mod init github.com/user/goforecast
go get -u github.com/gin-gonic/gin
Then, let's replace our main() function with a server and a route that takes a city name as a parameter and returns the weather forecast for that city.
Gin supports path parameters and query parameters.
// Path parameter
r.GET("/weather/:city", func(c *gin.Context) {
   	 city := c.Param("city")
   	 // ...
})

// Query parameter
r.GET("/weather", func(c *gin.Context) {
    city := c.Query("city")
    // ...
})
Which one you want to use depends on your use case. In our case, we want to submit the city name from a form in the end, so we will use a query parameter.
func main() {
    r := gin.Default()

    r.GET("/weather", func(c *gin.Context) {
   	 city := c.Query("city")
   	 latlong, err := getLatLong(city)
   	 if err != nil {
   		 c.JSON(http.StatusInternalServerError, gin.H{"error": err.Error()})
   		 return
   	 }

   	 weather, err := getWeather(*latlong)
   	 if err != nil {
   		 c.JSON(http.StatusInternalServerError, gin.H{"error": err.Error()})
   		 return
   	 }

   	 c.JSON(http.StatusOK, gin.H{"weather": weather})
    })

    r.Run()
}
In a separate terminal, we can start the server with go run . and make a request to it:
curl "localhost:8080/weather?city=Hamburg"
And we get our weather forecast:
{"weather":"{\"latitude\":53.550000,\"longitude\":10.000000, ... }
I like the log output and it's quite fast, too!
[GIN] 2023/09/09 - 19:27:20 | 200 |   190.75625ms |   	127.0.0.1 | GET  	"/weather?city=Hamburg"
[GIN] 2023/09/09 - 19:28:22 | 200 |   46.597791ms |   	127.0.0.1 | GET  	"/weather?city=Hamburg"
Templates
We got our endpoint, but raw JSON is not very useful to a normal user.
In a real-world application, we would probably serve the JSON response on an API
endpoint (say /api/v1/weather/:city) and add a separate endpoint that returns
the HTML page. For the sake of simplicity, we will just return the HTML page
directly.
Let's add a simple HTML page that displays the weather forecast for a given city
as a table. We will use the html/template package from the standard library to
render the HTML page.
First, let's add some structs for our view:
type WeatherData struct
type WeatherResponse struct {
    Latitude  float64 `json:"latitude"`
    Longitude float64 `json:"longitude"`
    Timezone  string  `json:"timezone"`
    Hourly	struct {
   	 Time      	[]string  `json:"time"`
   	 Temperature2m []float64 `json:"temperature_2m"`
    } `json:"hourly"`
}

type WeatherDisplay struct {
    City  	string
    Forecasts []Forecast
}

type Forecast struct {
    Date    	string
    Temperature string
}
This is just a direct mapping of the relevant fields in the JSON response to a struct. There are tools like transform, which make conversion from JSON to Go structs easier. Take a look!
Next we define a function, which converts the raw JSON response from the weather
API into our new WeatherDisplay struct:
func extractWeatherData(city string, rawWeather string) (WeatherDisplay, error) {
    var weatherResponse WeatherResponse
    if err := json.Unmarshal([]byte(rawWeather), &weatherResponse); err != nil {
   	 return WeatherDisplay{}, fmt.Errorf("error decoding weather response: %w", err)
    }

    var forecasts []Forecast
    for i, t := range weatherResponse.Hourly.Time {
   	 date, err := time.Parse(time.RFC3339, t)
   	 if err != nil {
   		 return WeatherDisplay{}, err
   	 }
   	 forecast := Forecast{
   		 Date:    	date.Format("Mon 15:04"),
   		 Temperature: fmt.Sprintf("%.1f°C", weatherResponse.Hourly.Temperature2m[i]),
   	 }
   	 forecasts = append(forecasts, forecast)
    }
    return WeatherDisplay{
   	 City:  	city,
   	 Forecasts: forecasts,
    }, nil
}
Date handling is done with the built-in time package.
To learn more about date handling in Go, check out this article.
We extend our route handler to render the HTML page:
r.GET("/weather", func(c *gin.Context) {
    city := c.Query("city")
    latlong, err := getLatLong(city)
    if err != nil {
   	 c.JSON(http.StatusInternalServerError, gin.H{"error": err.Error()})
   	 return
    }

    weather, err := getWeather(*latlong)
    if err != nil {
   	 c.JSON(http.StatusInternalServerError, gin.H{"error": err.Error()})
   	 return
    }

    //////// NEW CODE STARTS HERE ////////
    weatherDisplay, err := extractWeatherData(city, weather)
    if err != nil {
   	 c.JSON(http.StatusInternalServerError, gin.H{"error": err.Error()})
   	 return
    }
    c.HTML(http.StatusOK, "weather.html", weatherDisplay)
    //////////////////////////////////////
})
Let's deal with the template next.
Create a template directory called views and tell Gin about it:
r := gin.Default()
r.LoadHTMLGlob("views/*")
Finally, we can create a template file weather.html in the views directory:
<!DOCTYPE html>
<html>
	<head>
		<title>Weather Forecast</title>
	</head>
	<body>
		<h1>Weather for {{ .City }}</h1>
		<table border="1">
			<tr>
				<th>Date</th>
				<th>Temperature</th>
			</tr>
			{{ range .Forecasts }}
			<tr>
				<td>{{ .Date }}</td>
				<td>{{ .Temperature }}</td>
			</tr>
			{{ end }}
		</table>
	</body>
</html>
(Take a look at the Gin documentation for more details on how to use templates.)
With that, we have a working web service that returns the weather forecast for a given city as an HTML page!
Oh! Perhaps we also want to create an index page with an input field, which allows us to enter a city name and displays the weather forecast for that city.
Let's add a new route handler for the index page:
r.GET("/", func(c *gin.Context) {
    c.HTML(http.StatusOK, "index.html", nil)
})
And a new template file index.html:
<!DOCTYPE html>
<html>
	<head>
		<title>Weather Forecast</title>
	</head>
	<body>
		<h1>Weather Forecast</h1>
		<form action="/weather" method="get">
			<label for="city">City:</label>
			<input type="text" id="city" name="city" />
			<input type="submit" value="Submit" />
		</form>
	</body>
</html>
Now we can start our web service and open http://localhost:8080 in our browser:

The weather forecast for London looks like this. It's not pretty, but... functional! (And it works without JavaScript and in terminal browsers!)
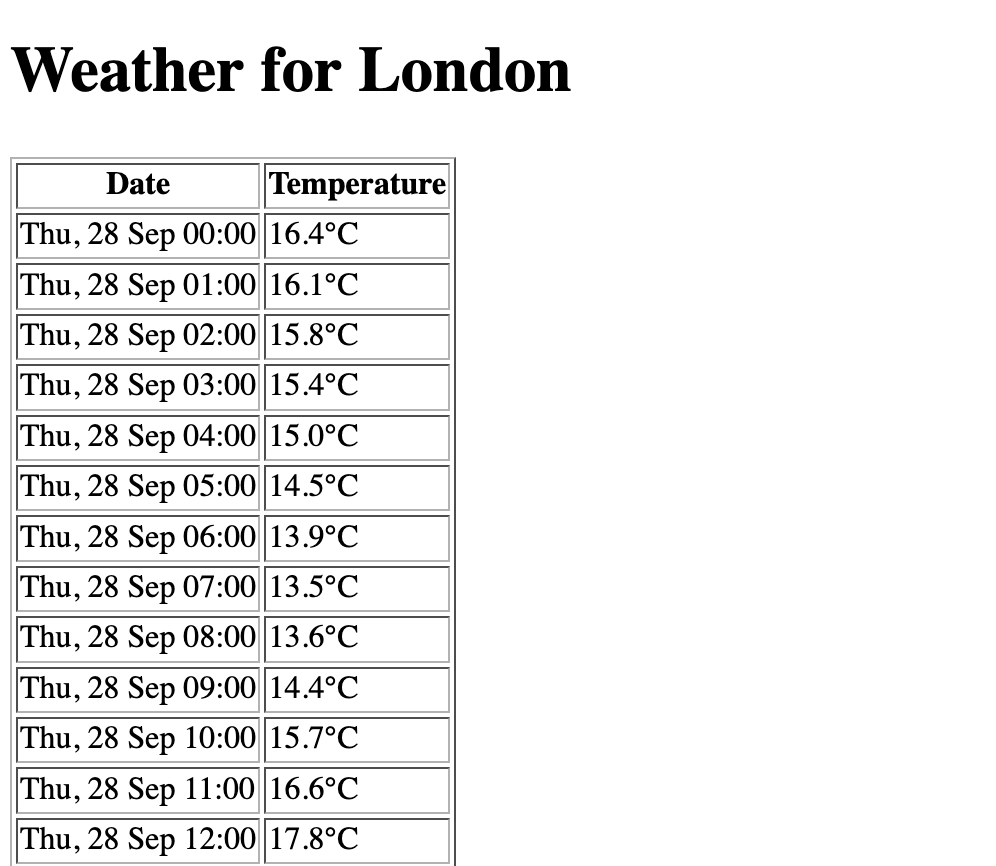
As an exercise, you can add some styling to the HTML page, but since we care more about the backend, we will leave it at that.
Database access
Our service fetches the latitude and longitude for a given city from an external API on every single request. That's probably fine in the beginning, but eventually we might want to cache the results in a database to avoid unnecessary API calls.
To do so, let's add a database to our web service. We will use PostgreSQL as our database and sqlx as the database driver.
First, we create a file named init.sql, which will be used to initialize our database:
CREATE TABLE IF NOT EXISTS cities (
	id SERIAL PRIMARY KEY,
	name TEXT NOT NULL,
	lat NUMERIC NOT NULL,
	long NUMERIC NOT NULL
);

CREATE INDEX IF NOT EXISTS cities_name_idx ON cities (name);
We store the latitude and longitude for a given city.
The SERIAL type is a PostgreSQL auto-incrementing integer.
To make things fast, we will also add an index on the name column.
It's probably easiest to use Docker or any of the cloud providers. At the end of the day, you just need a database URL, which you can pass to your web service as an environment variable.
We won't go into the details of setting up a database here, but a simple way to get a PostgreSQL database running with Docker locally is:
docker run -p 5432:5432 -e POSTGRES_USER=forecast -e POSTGRES_PASSWORD=forecast -e POSTGRES_DB=forecast -v `pwd`/init.sql:/docker-entrypoint-initdb.d/index.sql -d postgres
export DATABASE_URL="postgres://forecast:forecast@localhost:5432/forecast?sslmode=disable"
However once we have our database, we need to add the sqlx dependency to our go.mod file:
go get github.com/jmoiron/sqlx
We can now use the sqlx package to connect to our database by using the connection string from the DATABASE_URL environment variable:
_ = sqlx.MustConnect("postgres", os.Getenv("DATABASE_URL"))
And with that, we have a database connection!
Let's add a function to insert a city into our database.
We will use our LatLong struct from earlier.
func insertCity(db *sqlx.DB, name string, latLong LatLong) error {
    _, err := db.Exec("INSERT INTO cities (name, lat, long) VALUES ($1, $2, $3)", name, latLong.Latitude, latLong.Longitude)
    return err
}
Let's rename our old getLatLong function to fetchLatLong and add a new getLatLong function, which uses the database instead of the external API:
func getLatLong(db *sqlx.DB, name string) (*LatLong, error) {
    var latLong *LatLong
    err := db.Get(&latLong, "SELECT lat, long FROM cities WHERE name = $1", name)
    if err == nil {
   	 return latLong, nil
    }

    latLong, err = fetchLatLong(name)
    if err != nil {
   	 return nil, err
    }

    err = insertCity(db, name, *latLong)
    if err != nil {
   	 return nil, err
    }

    return latLong, nil
}
Here we directly pass the db connection to our getLatLong function.
In a real application, we should decouple the database access from the API logic, to make testing possible.
We would probably also use an in-memory-cache to avoid unnecessary database calls. This is just to compare database access in Go and Rust.
We need to update our handler:
r.GET("/weather", func(c *gin.Context) {
    city := c.Query("city")
    // Pass in the db
    latlong, err := getLatLong(db, city)
    // ...
})
With that, we have a working web service that stores the latitude and longitude for a given city in a database and fetches it from there on subsequent requests.
Middleware
The last bit is to add some middleware to our web service. We already got some nice logging for free from Gin.
Let's add a basic-auth middleware and protect our /stats endpoint,
which we will use to print the last search queries.
r.GET("/stats", gin.BasicAuth(gin.Accounts{
   	 "forecast": "forecast",
    }), func(c *gin.Context) {
   	 // rest of the handler
    }
)
That's it!
Pro-tip: you can also group routes together to apply authentication to multiple routes at once.
Here's the logic to fetch the last search queries from the database:
func getLastCities(db *sqlx.DB) ([]string, error) {
    var cities []string
    err := db.Select(&cities, "SELECT name FROM cities ORDER BY id DESC LIMIT 10")
    if err != nil {
   	 return nil, err
    }
    return cities, nil
}
Now let's wire up our /stats endpoint to print the last search queries:
r.GET("/stats", gin.BasicAuth(gin.Accounts{
   	 "forecast": "forecast",
    }), func(c *gin.Context) {
   	 cities, err := getLastCities(db)
   	 if err != nil {
   		 c.JSON(http.StatusInternalServerError, gin.H{"error": err.Error()})
   		 return
   	 }
   	 c.HTML(http.StatusOK, "stats.html", cities)
})
Our stats.html template is simple enough:
<!DOCTYPE html>
<html>
	<head>
		<title>Latest Queries</title>
	</head>

	<body>
		<h1>Latest Lat/Long Lookups</h1>
		<table border="1">
			<tr>
				<th>Cities</th>
			</tr>
			{{ range . }}
			<tr>
				<td>{{ . }}</td>
			</tr>
			{{ end }}
		</table>
	</body>
</html>
And with that, we have a working web service! Congratulations!
We have achieved the following:
- A web service that fetches the latitude and longitude for a given city from an external API
- Stores the latitude and longitude in a database
- Fetches the latitude and longitude from the database on subsequent requests
- Prints the last search queries on the
/statsendpoint - Basic-auth to protect the
/statsendpoint - Uses middleware to log requests
- Templates to render HTML
That's quite a lot of functionality for a few lines of code! Let's see how Rust stacks up!
A Rust web service
Historically, Rust didn't have a good story for web services. There were a few frameworks, but they were quite low-level. Only with the emergence of async/await, did the Rust web ecosystem really take off. Suddenly, it was possible to write highly performant web services without a garbage collector and with fearless concurrency.
We will see how Rust compares to Go in terms of ergonomics, performance and safety. But first, we need to choose a web framework.
Which web framework?
If you're looking to get a better overview of Rust web frameworks as well as their strengths and weaknesses, we recently did a Rust web framework deep-dive.
For the purpose of this article, we consider two web frameworks: Actix and Axum.
Actix is a very popular web framework in the Rust community. It is based on the actor model and uses async/await under the hood. In benchmark, it regularly shows up as one of the fastest web frameworks in the world.
Axum on the other hand is a new web framework that is based on tower, a library for building async services. It is quickly gaining popularity. It is also based on async/await.
Both frameworks are very similar in terms of ergonomics and performance. They both support middleware and routing. Each of them would be a good choice for our web service, but we will go with Axum, because it ties in nicely with the rest of the ecosystem and has gotten a lot of attention recently.
Routing
Let's start the project with a cargo new forecast and add the following dependencies to our Cargo.toml.
(We will need a few more, but we will add them later.)
[dependencies]
# web framework
axum = "0.6.20"
# async HTTP client
reqwest = { version = "0.11.20", features = ["json"] }
# serialization/deserialization  for JSON
serde = "1.0.188"
# database access
sqlx = "0.7.1"
# async runtime
tokio = { version = "1.32.0", features = ["full"] }
Let's create a little skeleton for our web service, which doesn't do much.
use std::net::SocketAddr;

use axum::{routing::get, Router};

// basic handler that responds with a static string
async fn index() -> &'static str {
	"Index"
}

async fn weather() -> &'static str {
	"Weather"
}

async fn stats() -> &'static str {
	"Stats"
}

#[tokio::main]
async fn main() {
	let app = Router::new()
    	.route("/", get(index))
    	.route("/weather", get(weather))
    	.route("/stats", get(stats));

	let addr = SocketAddr::from(([127, 0, 0, 1], 3000));
	axum::Server::bind(&addr)
    	.serve(app.into_make_service())
    	.await
    	.unwrap();
}
The main function is pretty straightforward. We create a router and bind it to a socket address. The index, weather and stats functions are our handlers. They are async functions that return a string. We will replace them with actual logic later.
Let's run the web service with cargo run and see what happens.
$ curl localhost:3000
Index
$ curl localhost:3000/weather
Weather
$ curl localhost:3000/stats
Stats
Okay, that works. Let's add some actual logic to our handlers.
Axum macros
Before we move on, I'd like to mention that axum has some rough edges.
E.g. it will yell at you if you forgot to make your handler function async.
So if you run into Handler<_, _> is not implemented errors, add the axum-macros crate and annotate your handler with #[axum_macros::debug_handler]. This will give you much better error messages.
Fetching the latitude and longitude
Let's write a function that fetches the latitude and longitude for a given city from an external API.
Here are the structs representing the response from the API:
use serde::Deserialize;

pub struct GeoResponse {
	pub results: Vec<LatLong>,
}

#[derive(Deserialize, Debug, Clone)]
pub struct LatLong {
	pub latitude: f64,
	pub longitude: f64,
}
In comparison to Go, we don't use tags to specify the field names. Instead, we
use the #[derive(Deserialize)] attribute from serde to automatically derive the
Deserialize trait for our structs. These derive macros are very powerful and
allow us to do a lot of things with very little code, including handling parsing
errors for our types. It is a very common pattern in Rust.
Let's use the new types to fetch the latitude and longitude for a given city:
async fn fetch_lat_long(city: &str) -> Result<LatLong, Box<dyn std::error::Error>> {
	let endpoint = format!(
    	"https://geocoding-api.open-meteo.com/v1/search?name={}&count=1&language=en&format=json",
    	city
	);
	let response = reqwest::get(&endpoint).await?.json::<GeoResponse>().await?;
	response
    	.results
    	.get(0)
    	.cloned()
    	.ok_or("No results found".into())
}
The code is a bit less verbose than the Go version. We don't have to
write if err != nil constructs, because we can use the ?
operator
to propagate errors. This is also mandatory, as each step returns a
Result type. If we don't handle the
error, we won't get access to the value.
That last part might look a bit unfamiliar:
response
	.results
	.get(0)
	.cloned()
	.ok_or("No results found".into())
A few things are happening here:
response.results.get(0)returns anOption<&LatLong>. It is anOptionbecause thegetfunction might returnNoneif the vector is empty.cloned()clones the value inside theOptionand converts theOption<&LatLong>into anOption<LatLong>. This is necessary, because we want to return aLatLongand not a reference. Otherwise, we would have to add a lifetime specifier to the function signature and it makes the code less readable.ok_or("No results found".into())converts theOption<LatLong>into aResult<LatLong, Box<dyn std::error::Error>>. If theOptionisNone, it will return the error message. Theinto()function converts the string into aBox<dyn std::error::Error>.
An alternative way to write this would be:
match response.results.get(0) {
	Some(lat_long) => Ok(lat_long.clone()),
	None => Err("No results found".into()),
}
It is a matter of taste which version you prefer.
Rust is an expression-based language, which means that we don't have to
use return to return a value from a function. Instead, the last value
of a function is returned.
We can now update our weather function to use fetch_lat_long.
Our first attempt might look like this:
async fn weather(city: String) -> String {
	println!("city: {}", city);
	let lat_long = fetch_lat_long(&city).await.unwrap();
	format!("{}: {}, {}", city, lat_long.latitude, lat_long.longitude)
}
First we print the city to the console, then we fetch the latitude and longitude and unwrap (i.e. "unpack") the result. If the result is an error, the program will panic. This is not ideal, but we will fix it later.
We then use the latitude and longitude to create a string and return it.
Let's run the program and see what happens:
curl -v "localhost:3000/weather?city=Berlin"
*   Trying 127.0.0.1:3000...
* Connected to localhost (127.0.0.1) port 3000 (#0)
> GET /weather?city=Berlin HTTP/1.1
> Host: localhost:3000
> User-Agent: curl/8.1.2
> Accept: */*
>
* Empty reply from server
* Closing connection 0
curl: (52) Empty reply from server
Furthermore, we get this output:
city:
The city parameter is empty. What happened?
The problem is that we are using the String type for the city
parameter. This type is not a valid extractor.
We can use the Query extractor instead:
async fn weather(Query(params): Query<HashMap<String, String>>) -> String {
	let city = params.get("city").unwrap();
	let lat_long = fetch_lat_long(&city).await.unwrap();
	format!("{}: {}, {}", *city, lat_long.latitude, lat_long.longitude)
}
This will work, but it is not very idiomatic. We have to unwrap
the Option to get the city. We also need to pass *city to the
format! macro to get the value instead of the reference. (It's
called "dereferencing" in Rust lingo.)
We could create a struct that represents the query parameters:
#[derive(Deserialize)]
pub struct WeatherQuery {
	pub city: String,
}
We can then use this struct as an extractor and avoid the unwrap:
async fn weather(Query(params): Query<WeatherQuery>) -> String {
let lat_long = fetch_lat_long(¶ms.city).await.unwrap();
format!("{}: {}, {}", params.city, lat_long.latitude, lat_long.longitude)
}
Cleaner! It's a little more involved than the Go version, but it's also more type-safe. You can imagine that we can add constraints to the struct to add validation. For example, we could require that the city is at least 3 characters long.
Now about the unwrap in the weather function.
Ideally, we would return an error if the city is not found. We can do
this by changing our return type.
In axum, anything that implements IntoResponse can be returned from handlers, however it is advisable to return
a concrete type, as there are
[some caveats with returning impl IntoResponse] (https://docs.rs/axum/latest/axum/response/index.html)
In our case, we can return a Result type:
async fn weather(Query(params): Query<WeatherQuery>) -> Result<String, StatusCode> {
match fetch_lat_long(¶ms.city).await {
Ok(lat_long) => Ok(format!(
"{}: {}, {}",
params.city, lat_long.latitude, lat_long.longitude
)),
Err(_) => Err(StatusCode::NOT_FOUND),
}
}
This will return a 404 status code if the city is not found.
We use match to match on the result of fetch_lat_long. If it is
Ok, we return the weather as a String. If it is Err, we return
a StatusCode::NOT_FOUND.
We could also use the map_err function to convert the error into a
StatusCode:
async fn weather(Query(params): Query<WeatherQuery>) -> Result<String, StatusCode> {
let lat_long = fetch_lat_long(¶ms.city)
.await
.map_err(|_| StatusCode::NOT_FOUND)?;
Ok(format!(
"{}: {}, {}",
params.city, lat_long.latitude, lat_long.longitude
))
}
This variant has the advantage that we the control flow is more linear: we handle the error right away and can then continue with the happy path. On the other hand, it takes a while to get used to these combinator patterns until they become second nature.
In Rust, there are usually multiple ways to do things. It's a matter of taste which version you prefer. In general, keep it simple and don't overthink it.
In any case, let's test our program:
curl "localhost:3000/weather?city=Berlin"
Berlin: 52.52437, 13.41053
and
curl -I "localhost:3000/weather?city=abcdedfg"
HTTP/1.1 404 Not Found
Let's write our second function, which will return the weather for a given latitude and longitude:
async fn fetch_weather(lat_long: LatLong) -> Result<String, Box<dyn std::error::Error>> {
	let endpoint = format!(
    	"https://api.open-meteo.com/v1/forecast?latitude={}&longitude={}&hourly=temperature_2m",
    	lat_long.latitude, lat_long.longitude
	);
	let response = reqwest::get(&endpoint).await?.text().await?;
	Ok(response)
}
Here we make the API request and return the raw response body as a String.
We can extend our handler to make the two calls in succession:
async fn weather(Query(params): Query<WeatherQuery>) -> Result<String, StatusCode> {
let lat_long = fetch_lat_long(¶ms.city)
.await
.map_err(|_| StatusCode::NOT_FOUND)?;
let weather = fetch_weather(lat_long)
.await
.map_err(|_| StatusCode::INTERNAL_SERVER_ERROR)?;
Ok(weather)
}
This would work, but it would return the raw response body from the Open Meteo API. Let's parse the response and return the data similar to the Go version.
As a reminder, here's the Go definition:
type WeatherResponse struct {
    Latitude  float64 `json:"latitude"`
    Longitude float64 `json:"longitude"`
    Timezone  string  `json:"timezone"`
    Hourly	struct {
   	 Time      	[]string  `json:"time"`
   	 Temperature2m []float64 `json:"temperature_2m"`
    } `json:"hourly"`
}
And here is the Rust version:
#[derive(Deserialize, Debug)]
pub struct WeatherResponse {
	pub latitude: f64,
	pub longitude: f64,
	pub timezone: String,
	pub hourly: Hourly,
}

#[derive(Deserialize, Debug)]
pub struct Hourly {
	pub time: Vec<String>,
	pub temperature_2m: Vec<f64>,
}
While we're at it, let's also define the other structs we need:
#[derive(Deserialize, Debug)]
pub struct WeatherDisplay {
	pub city: String,
	pub forecasts: Vec<Forecast>,
}

#[derive(Deserialize, Debug)]
pub struct Forecast {
	pub date: String,
	pub temperature: String,
}
We can now parse the response body into our structs:
async fn fetch_weather(lat_long: LatLong) -> Result<WeatherResponse, Box<dyn std::error::Error>> {
	let endpoint = format!(
    	"https://api.open-meteo.com/v1/forecast?latitude={}&longitude={}&hourly=temperature_2m",
    	lat_long.latitude, lat_long.longitude
	);
	let response = reqwest::get(&endpoint).await?.json::<WeatherResponse>().await?;
	Ok(response)
}
Let's adjust the handler. The easiest way to make it compile is to
return a String:
async fn weather(Query(params): Query<WeatherQuery>) -> Result<String, StatusCode> {
let lat_long = fetch_lat_long(¶ms.city)
.await
.map_err(|_| StatusCode::NOT_FOUND)?;
let weather = fetch_weather(lat_long)
.await
.map_err(|_| StatusCode::INTERNAL_SERVER_ERROR)?;
let display = WeatherDisplay {
city: params.city,
forecasts: weather
.hourly
.time
.iter()
.zip(weather.hourly.temperature_2m.iter())
.map(|(date, temperature)| Forecast {
date: date.to_string(),
temperature: temperature.to_string(),
})
.collect(),
};
Ok(format!("{:?}", display))
}
Note how we mix the parsing logic with the handler logic. Let's clean this up a bit by moving the parsing logic into a constructor function:
impl WeatherDisplay {
/// Create a new `WeatherDisplay` from a `WeatherResponse`.
fn new(city: String, response: WeatherResponse) -> Self {
let display = WeatherDisplay {
city,
forecasts: response
.hourly
.time
.iter()
.zip(response.hourly.temperature_2m.iter())
.map(|(date, temperature)| Forecast {
date: date.to_string(),
temperature: temperature.to_string(),
})
.collect(),
};
display
}
}```
That's a start. Our handler now looks like this:
```rust
async fn weather(Query(params): Query<WeatherQuery>) -> Result<String, StatusCode> {
let lat_long = fetch_lat_long(¶ms.city)
.await
.map_err(|_| StatusCode::NOT_FOUND)?;
let weather = fetch_weather(lat_long)
.await
.map_err(|_| StatusCode::INTERNAL_SERVER_ERROR)?;
let display = WeatherDisplay::new(params.city, weather);
Ok(format!("{:?}", display))
}
That's already a little bit better.
What's distracting is the map_err boilerplate.
We can remove that by introducing a custom error type.
For instance, we can follow the example in the axum repository and use anyhow,
a popular crate for error handling:
cargo add anyhow
Let's copy the code from the example into our project:
// Make our own error that wraps `anyhow::Error`.
struct AppError(anyhow::Error);

// Tell axum how to convert `AppError` into a response.
impl IntoResponse for AppError {
	fn into_response(self) -> Response {
    	(
        	StatusCode::INTERNAL_SERVER_ERROR,
        	format!("Something went wrong: {}", self.0),
    	)
        	.into_response()
	}
}

// This enables using `?` on functions that return `Result<_, anyhow::Error>` to turn them into
// `Result<_, AppError>`. That way you don't need to do that manually.
impl<E> From<E> for AppError
where
	E: Into<anyhow::Error>,
{
	fn from(err: E) -> Self {
    	Self(err.into())
	}
}
You don't have to fully understand this code. Suffice to say that will set up the error handling for the application so that we don't have to deal with it in the handler.
We have to adjust the fetch_lang_long and fetch_weather functions
to return a Result with an anyhow::Error:
async fn fetch_lat_long(city: &str) -> Result<LatLong, anyhow::Error> {
	let endpoint = format!(
    	"https://geocoding-api.open-meteo.com/v1/search?name={}&count=1&language=en&format=json",
    	city
	);
	let response = reqwest::get(&endpoint).await?.json::<GeoResponse>().await?;
	response.results.get(0).cloned().context("No results found")
}
and
async fn fetch_weather(lat_long: LatLong) -> Result<WeatherResponse, anyhow::Error> {
  // code stays the same
}
At the price of adding a dependency and adding the additional boilerplate for error handling, we managed to simplify our handler quite a bit:
async fn weather(Query(params): Query<WeatherQuery>) -> Result<String, AppError> {
let lat_long = fetch_lat_long(¶ms.city).await?;
let weather = fetch_weather(lat_long).await?;
let display = WeatherDisplay::new(params.city, weather);
Ok(format!("{:?}", display))
}
Templates
axum doesn't come with a templating engine.
We have to pick one ourselves.
I usually use either tera or askama with a slight preference for askama because it supports compile-time syntax checks. With that, you cannot accidentally introduce typos in a template. Every variable you use in a template has to be defined in the code.
# Enable axum support
cargo add askama --features=with-axum
# I also needed to add this to make it compile
cargo add askama_axum
Let's create a templates directory and add a weather.html template,
similar to the Go table template we created earlier:
<!DOCTYPE html>
<html lang="en">
	<head>
		<meta charset="UTF-8" />
		<title>Weather</title>
	</head>
	<body>
		<h1>Weather for {{ city }}</h1>
		<table>
			<thead>
				<tr>
					<th>Date</th>
					<th>Temperature</th>
				</tr>
			</thead>
			<tbody>
				{% for forecast in forecasts %}
				<tr>
					<td>{{ forecast.date }}</td>
					<td>{{ forecast.temperature }}</td>
				</tr>
				{% endfor %}
			</tbody>
		</table>
	</body>
</html>
Let's convert our WeatherDisplay struct into a Template:
#[derive(Template, Deserialize, Debug)]
#[template(path = "weather.html")]
struct WeatherDisplay {
	city: String,
	forecasts: Vec<Forecast>,
}
and our handler becomes:
async fn weather(Query(params): Query<WeatherQuery>) -> Result<WeatherDisplay, AppError> {
let lat_long = fetch_lat_long(¶ms.city).await?;
let weather = fetch_weather(lat_long).await?;
Ok(WeatherDisplay::new(params.city, weather))
}
It was a bit of work to get here, but we now have a nice separation of concerns without too much boilerplate.
If you open the browser at http://localhost:3000/weather?city=Berlin, you should see the weather table.
Adding our input mask is easy. We can use the exact same HTML we used for the Go version:
<form action="/weather" method="get">
	<!DOCTYPE html>
	<html>
		<head>
			<title>Weather Forecast</title>
		</head>
		<body>
			<h1>Weather Forecast</h1>
			<form action="/weather" method="get">
				<label for="city">City:</label>
				<input type="text" id="city" name="city" />
				<input type="submit" value="Submit" />
			</form>
		</body>
	</html>
</form>
and here is the handler:
#[derive(Template)]
#[template(path = "index.html")]
struct IndexTemplate;

async fn index() -> IndexTemplate {
	IndexTemplate
}
Let's move on to storing the latitudes and longitudes in a database.
Database access
We will use sqlx for database access. It's a very popular crate that supports multiple databases. In our case, we will use Postgres, just like in the Go version.
Add this to your Cargo.toml:
sqlx = { version = "0.7", features = [
	"runtime-tokio-rustls",
	"macros",
	"any",
	"postgres",
] }
We need to add a DATABASE_URL environment variable to our .env file:
export DATABASE_URL="postgres://forecast:forecast@localhost:5432/forecast?sslmode=disable"
If you don't have Postgres running still, you can start it with the same Docker snippet from our Go section.
With that, let's adjust our code to use the database.
First, the main function:
#[tokio::main]
async fn main() -> anyhow::Result<()> {
	let db_connection_str = std::env::var("DATABASE_URL").context("DATABASE_URL must be set")?;
	let pool = sqlx::PgPool::connect(&db_connection_str)
    	.await
    	.context("can't connect to database")?;

	let app = Router::new()
    	.route("/", get(index))
    	.route("/weather", get(weather))
    	.route("/stats", get(stats))
    	.with_state(pool);

	let addr = SocketAddr::from(([127, 0, 0, 1], 3000));
	axum::Server::bind(&addr)
    	.serve(app.into_make_service())
    	.await?;

	Ok(())
}
Here's what changed:
- We added a
DATABASE_URLenvironment variable and read it inmain. - We create a database connection pool with
sqlx::PgPool::connect. - Then we pass the pool to
with_stateto make it available to all handlers.
In each route, we can (but don't have to) access the database pool like this:
async fn weather(
Query(params): Query<WeatherQuery>,
State(pool): State<PgPool>,
) -> Result<WeatherDisplay, AppError> {
let lat_long = fetch_lat_long(¶ms.city).await?;
let weather = fetch_weather(lat_long).await?;
Ok(WeatherDisplay::new(params.city, weather))
}
To learn more about State, check out the documentation.
To make our data fetchable from the database, we need to add a FromRow trait to our structs:
#[derive(sqlx::FromRow, Deserialize, Debug, Clone)]
pub struct LatLong {
	pub latitude: f64,
	pub longitude: f64,
}
Let's add a function to fetch the latitudes and longitudes from the database:
async fn get_lat_long(pool: &PgPool, name: &str) -> Result<LatLong, anyhow::Error> {
	let lat_long = sqlx::query_as::<_, LatLong>(
    	"SELECT lat AS latitude, long AS longitude FROM cities WHERE name = $1",
	)
	.bind(name)
	.fetch_optional(pool)
	.await?;

	if let Some(lat_long) = lat_long {
    	return Ok(lat_long);
	}

	let lat_long = fetch_lat_long(name).await?;
	sqlx::query("INSERT INTO cities (name, lat, long) VALUES ($1, $2, $3)")
    	.bind(name)
    	.bind(lat_long.latitude)
    	.bind(lat_long.longitude)
    	.execute(pool)
    	.await?;

	Ok(lat_long)
}
and finally, let's update our weather route to use the new function:
async fn weather(
Query(params): Query<WeatherQuery>,
State(pool): State<PgPool>,
) -> Result<WeatherDisplay, AppError> {
let lat_long = fetch_lat_long(¶ms.city).await?;
let weather = fetch_weather(lat_long).await?;
Ok(WeatherDisplay::new(params.city, weather))
}
And that's it! We now have a working web app with a database backend. The behavior is identical to before, but now we cache the latitudes and longitudes.
Middleware
The last feature that we're missing from our Go version is the /stats endpoint. Remember that it shows the recent queries and is behind basic auth.
Let's start with basic auth.
It took me a while to figure out how to do this. There are numerous authentication libraries for axum, but very little information on how to do basic auth.
I ended up writing a custom middleware, that would
- check if the request has an
Authorizationheader - if it does, check if the header contains a valid username and password
- if it does, return an "unauthorized" response and a
WWW-Authenticateheader, which instructs the browser to show a login dialog.
Here's the code:
/// A user that is authorized to access the stats endpoint.
///
/// No fields are required, we just need to know that the user is authorized. In
/// a production application you would probably want to have some kind of user
/// ID or similar here.
struct User;

#[async_trait]
impl<S> FromRequestParts<S> for User
where
	S: Send + Sync,
{
	type Rejection = axum::http::Response<axum::body::Body>;

	async fn from_request_parts(parts: &mut Parts, _: &S) -> Result<Self, Self::Rejection> {
    	let auth_header = parts
        	.headers
        	.get("Authorization")
        	.and_then(|header| header.to_str().ok());

    	if let Some(auth_header) = auth_header {
        	if auth_header.starts_with("Basic ") {
            	let credentials = auth_header.trim_start_matches("Basic ");
            	let decoded = base64::decode(credentials).unwrap_or_default();
            	let credential_str = from_utf8(&decoded).unwrap_or("");

            	// Our username and password are hardcoded here.
            	// In a real app, you'd want to read them from the environment.
            	if credential_str == "forecast:forecast" {
                	return Ok(User);
            	}
        	}
    	}

    	let reject_response = axum::http::Response::builder()
        	.status(StatusCode::UNAUTHORIZED)
        	.header(
            	"WWW-Authenticate",
            	"Basic realm=\"Please enter your credentials\"",
        	)
        	.body(axum::body::Body::from("Unauthorized"))
        	.unwrap();

    	Err(reject_response)
	}
}
FromRequestParts is a trait that allows us to extract data from the request.
There's also FromRequest, which consumes the entire request body and can thus only be run once for handlers. In our case, we just need to read the Authorization header, so FromRequestParts is enough.
The beauty is, that we can simple add the User type to any handler and it will extract the user from the request:
async fn stats(user: User) -> &'static str {
	"We're authorized!"
}
Now about the actual logic for the /stats endpoint.
#[derive(Template)]
#[template(path = "stats.html")]
struct StatsTemplate {
	pub cities: Vec<City>,
}

async fn get_last_cities(pool: &PgPool) -> Result<Vec<City>, AppError> {
    let cities = sqlx::query_as::<_, City>("SELECT name FROM cities ORDER BY id DESC LIMIT 10")
        .fetch_all(pool)
        .await?;
    Ok(cities)
}

async fn stats(_user: User, State(pool): State<PgPool>) -> Result<StatsTemplate, AppError> {
	let cities = get_last_cities(&pool).await?;
	Ok(StatsTemplate { cities })
}
Deployment
Lastly, let's talk about deployment.
Since both languages compile to a statically linked binary, they can be hosted on any Virtual Machine (VM) or Virtual Private Server (VPS). That is amazing because it means that you can run your application natively on bare metal if you like.
Another option is to use containers, which run your application in an isolated environment. They are very popular because they are easy to use and can be deployed virtually anywhere.
For Golang, you can use any cloud provider that supports running static binaries or containers. One of the more popular options is Google Cloud Run.
You can of course also use containers to ship Rust, but there are other options, too. One of them is Shuttle, of course, and the way it works is different to other services: You don't need to build a Docker image and push it to a registry. Instead, you just push your code to a Git repository and Shuttle will build and run the binary for you.
Thanks to Rust's procedural macros, you can enhance your code with additional functionality quickly.
All it takes to get started is #[shuttle_runtime::main] on your main function:
#[shuttle_runtime::main]
async fn main() -> Result<(), Box<dyn std::error::Error>> {
	// Rest of your code goes here
}
To get started, install the Shuttle CLI and dependencies.
You can utilize cargo binstall, a Cargo plugin designed to install binaries from crates.io. First, ensure you have the plugin installed. After that, you'll be able to install the Shuttle CLI:
cargo binstall cargo-shuttle
cargo add shuttle-axum shuttle-runtime
Let's modify our main function to use Shuttle.
Note how we no longer need the port binding, as Shuttle will take care of that
for us! We just hand it the router and it will take care of the rest.
#[shuttle_runtime::main]
async fn main() -> shuttle_axum::ShuttleAxum {
	let db_connection_str = std::env::var("DATABASE_URL").context("DATABASE_URL must be set")?;
	let pool = sqlx::PgPool::connect(&db_connection_str)
    	.await
    	.context("can't connect to database")?;

	let router = Router::new()
    	.route("/", get(index))
    	.route("/weather", get(weather))
    	.route("/stats", get(stats))
    	.with_state(pool);

	Ok(router.into())
}
Next, let's set up our production postgres database. There's a macro for that, too.
cargo add shuttle-shared-db --features=postgres
and
#[shuttle_runtime::main]
async fn main(#[shuttle_shared_db::Postgres] pool: PgPool) -> shuttle_axum::ShuttleAxum {
	pool.execute(include_str!("../schema.sql"))
    	.await
    	.context("Failed to initialize DB")?;

	let router = Router::new()
    	.route("/", get(index))
    	.route("/weather", get(weather))
    	.route("/stats", get(stats))
    	.with_state(pool);

	Ok(router.into())
}
See that part about the schema? That's how we initialize our database with our existing table definitions. Migrations are also supported through sqlx and sqlx-cli.
We got rid of a lot of boilerplate code and can now deploy our app with ease.
# Run as often as you like
shuttle deploy
When it's done, it will print the URL to the service. It should work just like before, but now it's running on a server in the cloud. 🚀
A Comparison Between Go And Rust
Let's see how the two versions stacked up against each other.
The Go version
The Go version is very simple and straightforward. We only needed to add two
dependencies: Gin (the web framework) and sqlx (the database driver). Apart
from that, everything was provided by the standard library: the templating engine, the
JSON parser, the datetime handling, etc.
Even though I'm personally not a big fan of Go's templating engine and error handling mechanisms, I felt productive throughout the entire development process. We could have used an external templating library, but we didn't need to as the built-in one was just fine for our use case. If you're looking to leverage the power of Go for your projects, you might want to hire a Golang developer.
The Rust version
The Rust code is a little more involved. We needed to add a lot of dependencies to get the same functionality as in Go. For example, we needed to add a templating engine, a JSON parser, a datetime library, a database driver, and a web framework.
This is by design. Rust's standard library is very minimal and only provides the most basic building blocks. The idea is that you can pick and choose the dependencies that you need for your project. It helps the ecosystem to evolve faster and allows for more experimentation while the core of the language stays stable.
Even though it took longer to get started, I enjoyed the process of working
my way up to higher levels of abstraction. At no point did I feel like I was
stuck with a suboptimal solution. With the proper abstractions in place,
such as the ? operator and the FromRequest trait, the code felt easy to read
without any boilerplate or unnecessarily verbose error handling.
Summary
-
Go:
- Easy to learn, fast, good for web services
- Batteries included. We did a lot with just the standard library. For example, we didn't need to add a templating engine or a separate auth library.
- Our only external dependencies were
Ginandsqlx
-
Rust:
- Fast, safe, evolving ecosystem for web services
- No batteries included. We had to add a lot of dependencies to get the same functionality as in Go and write our own small middleware.
- The final handler code was free from distracting error handling, because
we used our own error type and the
?operator. This makes for very readable code, at the cost of having to write additional adapter logic. The handlers are succinct, and there's a natural separation of concerns.
That begs the question...
Is Rust better than Go, or will Rust replace Go?
Personally, I'm a big fan of Rust and I think it's a great language for web services. But there are still a few rough edges and missing pieces in the ecosystem.
Especially for newcomers, the error messages when using axum can at times be quite cryptic. For example, a common one is this error message, which occurs on routes that do not implement the handler trait because of type mismatches:
error[E0277]: the trait bound `(): Handler<_, _>` is not satisfied
   --> src\router.rs:22:50
    |
22  |         router = router.route("/", get(handler));
    |                                    --- ^^^^^^^^^^^^^^^^^^^^^^^ the trait `Handler<_, _>` is not implemented for `()`
    |                                    |
    |                                    required by a bound introduced by this call
    |
note: required by a bound in `axum::routing::get`
For this case, I recommend the axum debug_handler,
which simplifies the error messages quite a bit. Read more about it in their
documentation.
In comparison to Go, the authorization part was also more involved. In Go, we could just use a middleware and be done with it. In Rust, we had to write our own middleware and error type. This is not necessarily a bad thing, but it requires some research in the axum docs to find the right solution. Granted, basic auth is not a common use case for real-world applications, and there are plenty of advanced auth libraries to choose from.
The mentioned issues are not deal breakers and mostly papercuts related to specific crates. Core Rust has reached a point of stability and maturity that makes it suitable for production use. The ecosystem is still evolving, but it's already in a good place.
On the other hand, I personally find the final Go code a little bit too verbose.
The error handling is very explicit, but it also distracts from the actual
business logic.
In general, I found myself reaching for higher-level abstractions in Go (like the
aforementioned FromRequest trait in the Rust version). The final Rust
code feels more succinct. It felt like the Rust compiler was quietly guiding me
towards a better design throughout the entire process.
There's certainly a higher upfront cost to using Rust, but the ergonomics are
great once you get over the initial scaffolding phase.
I don't think one language is better than the other. It's a matter of taste and personal preference. The philosophies of the two languages are quite different, but they both allow you to build fast and reliable web services.
Should I use Rust or Go in 2023?
If you’re just starting out with a new project, and you and your team could freely pick a language to use, you might be wondering which one to choose.
It depends on the timeframe for the project and your team's experience. If you're looking to get started quickly, Go might be the better choice. It offers a batteries-included development environment and is great for web apps.
However, don’t underestimate the long-term benefits of Rust. Its rich type system paired with its awesome error handling mechanisms and compile-time checks can help you build apps which are not only fast but also robust and extensible.
With regards to developer velocity, Shuttle can substantially lower the operational burden from running Rust code in production. As we’ve seen, you don’t need to write a Dockerfile to get started and your code builds natively in the cloud, which allows for very fast deployment- and iteration cycles.
So if you're looking for a long-term solution, and you're willing to invest in learning Rust, I’d say it's a great choice.
I invite you to compare both solutions and decide for yourself which one you like better.
In any case, it was fun to build the same project in two different languages and look at the differences in idioms and ecosystem. Even though the end result is the same, the way we got there was quite different.